Day One Sailing Route — Quick guide to 50 Sailing
Based on an early-route video walkthrough, this guide condenses the day-one route and checklist so you can reach roughly 50 Sailing in the first few hours after release. Embedded video below for the full visual walkthrough.
Quick summary
- Start at Pandemonium: complete the introductory quest to gain ~300 Sailing XP (level 4) and use the nearby sea chart for extra XP.
- Use port tasks and sea charting interactions while traveling (Lumbridge Basin, Musa Point, etc.) to stack XP quickly.
- Complete the Prying Times quest early to obtain crowbars needed for charting and events, then buy and upgrade a small boat (~10k GP) to access better activities.
- From ~level 31, run Barakura trials for repeatable, high early XP and unlock AFK options (shipwreck salvaging) at higher levels.
Video walkthrough
Video: day-one sailing route and commentary. Use the video for an in-game visual route and timings.
Step-by-step route (condensed)
Complete the Pandemonium quest (starts at Port Sarim) — you get ~300 Sailing XP and basic steering practice. Immediately do the nearby sea charting interaction for ~50 XP.
Take port tasks from Pandemonium and deliver them back to Port Sarim to push to ~level 7, then continue picking up/turning in tasks between Port Sarim, Musa Point, and Lumbridge Basin while completing sea charting options found en route (Lumbridge Basin corpse, spyglass, treacherous rock, etc.).
At ~level 12, unlock and complete the Prying Times quest (start at Pandemonium) to obtain crowbars — these are used for many sea charting interactions and random events.
Buy a small boat (~10k GP) and customize upgrades (oak cargo/hull, iron helm/gel where available) to increase access and efficiency. Use port tasks and sea charts to reach level ~22 and then continue quest chains for further unlocks.
From ~level 28–31, you gain better task throughput (3 tasks at once) and unlock Barakura trials — complete the trials for one-time clear bonuses and use repeat completions for fast XP (first completion of each stage grants substantial bonus XP).
Continue Barakura trials until ~40–45, upgrade to steel trims/helm as available, recruit a crewmate (optional) to unlock more activities, then finish the Double Tortugans quest (~level 45) and push to ~50 using port tasks, trials, and shipwreck salvaging AFK when unlocked.
Cargo & port tasks — mechanics & tips
Early sailing progression relies heavily on notice-board port tasks. A few important practical notes from community testing:
- Notice board tasks have level requirements — icons on the board indicate the sailing level needed to accept each task.
- Your accepted tasks are limited by your boat / task capacity: as you level up you can accept more tasks at once (e.g. at low levels you may only accept 1–2 tasks; later you can accept up to 3+).
- Accepting two tasks doesn't necessarily mean both crates spawn in the same location — you may pick one up here and another elsewhere, then deliver both to their destinations.
- XP & GP per crate are small: community examples show ~53 XP per basic crate and ~60 XP for slightly higher-tier crates, with GP rewards ~50–60gp per crate — treat port tasks as steady padding rather than primary XP/gp.
- Use quick-deposit or menu-swap tools to speed up loading/unloading. Left-click deposit makes the loop much faster. However, this skill is not heavily AFK — navigation and occasional interactions are required.
Practical tip: accept tasks that line up geographically (pick destinations on the same route) and use sea chart interactions en-route for extra XP. If a single task won't push you to the next quest requirement, take additional low-cost tasks to bridge the gap.
Pre-ride checklist
- Make a couple of repair kits in your POH workshop (acts as food for your boat repairs).
- Bring a saw (equipable is ideal) and a hammer at all times.
- Have ~10k GP for the small boat purchase and minor upgrades.
- Keep an eye out for random events and sea charting interactions — they often give helpful bonus XP.
25-30k Sailing XP/hr: Cannoning Osprey (Level 30+)Community Tip
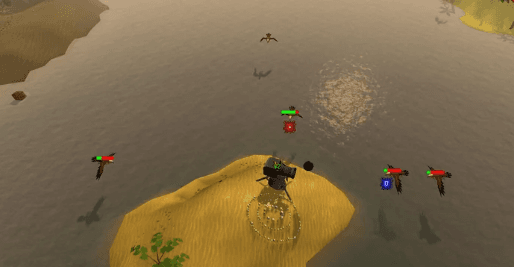
At level 30 you can get the port task to kill Osprey and collect 3 feathers. For fast XP:
- Go to fairy ring AIR with a cannon and ranged gear.
- Set up your cannon and range Osprey until you collect 3 feathers.
- Teleport to Brimhaven with a Construction cape (if you have it), run north to the dock, and turn in the task.
- Click the notice board to get another Osprey task, then home teleport and use the fairy ring in your POH to return to AIR.
- Repeat for consistent 25–30k Sailing XP/hr.
Tip: This method is fast, repeatable, and can be done with minimal banking if you bring enough cannonballs and teleports.
Further reading & related
- Video walkthrough: Day One Sailing Route (YouTube)
- OSRS Wiki: check the official Sailing pages and sea charting lists for complete locations and unlock requirements.
- Related tools: Skill calculator
 Barracuda Tempor Tantrum Tile Pack — Import the ground marker tile pack for Barracuda - Tempor Tantrum (Marlin Rank). Community tile pack for the most efficient route.
- Jubbly Jive Tile Pack — Import the full ground marker tile pack for The Jubbly Jive Barracuda Trial (Marlin Rank).
Full text guide — quick & readable
This guide synthesizes early community testing and two creator walkthroughs to give a compact, easy-to-follow day-one route for Sailing. The focus: reach ~50 Sailing quickly using quests, port tasks, sea charting interactions and Barakura trials while keeping gameplay straightforward.
Why this route works
Jagex published sailing mechanics before release, so early players can chain efficient XP sources: short quest rewards, numerous low-effort sea-chart interactions (each worth ~50 XP), and repeatable activities (port tasks and trials) that scale with level. This route balances steady XP with low overhead — useful when the best high-level methods are gated behind quests or upgrades.
At-a-glance route (first 0–50)
- Do the Pandemonium starter quest (Port Sarim) — ~300 Sailing XP and a sea chart nearby worth ~50 XP.
- Complete nearby sea-chart interactions and pick up port tasks — use them to push through levels 4→7→10 quickly.
- At ~level 12, complete Prying Times to get crowbars (used for charting and random events).
- Buy and upgrade a small boat (~10k GP) once practical — add oak cargo/hull and basic helm/gel upgrades to unlock more activities.
- Use port tasks, sea charts and Barakura trials (first completions give bonus XP) from ~28–40 to accelerate progress; upgrade to steel parts and recruit a crewmate as you approach 45.
- After ~45, finish the Double Tortugans quest and use port tasks / shipwreck salvaging to reach 50 and unlock big-boat content.
Step-by-step (detailed)
- Pandemonium starter: finish the quest, then interact with the nearby sea charting node before leaving — saves time and yields immediate XP.
- Notice-board tasks: accept geographically-aligned port tasks (pick destinations on your sailing route). At low levels you can accept 1–2 tasks; at higher levels you can accept 3+, which increases XP throughput.
- Sea charting: keep an eye out for local chart nodes (Lumbridge Basin, Mods Skipper Sound, Remington Strait, etc.). Each interactive node is quick and gives ~50 XP each — they add up fast when combined with port tasks.
- Prying Times & quests: many quests give useful Sailing XP and unlocks (crowbars, ducks, crew members). Prioritise quests that both reward XP and open new activities.
- Boat upgrades: early upgrades to oak cargo/hull and iron helm/gel significantly expand what you can do. Aim for the minimal set that unlocks the next quests/tasks rather than maxing aesthetics early.
- Barakura trials: do each trial at least once for the large first-completion XP bonus, then repeat the best trials for efficient XP between levels ~31–45.
- AFK options: at ~35+ you unlock shipwreck salvaging (and steel salvaging hooks later) — a decent semi-AFK option while you plan next quests or upgrades.
Cargo & task mechanics (practical tips)
- Task capacity vs crate spawn: accepting two tasks doesn't guarantee both crates spawn at the same spot — tasks may require pickups from different locations; plan routes accordingly.
- XP & GP per crate are small (reports show ~50–60 XP and ~50–60 GP per crate) — treat port tasks as steady XP, not primary GP farming.
- Use quick-deposit (or menu-swap) and left-click deposit to speed loading/unloading loops. The time saved compounds over many trips.
- Always prefer tasks that fit the route you’re taking; avoid long detours that waste time between pickups and deliveries.
Upgrades & crew
Buy the small boat early (when you can) and prioritize functional upgrades (cargo capacity, hull, helm, gels) that unlock access and improve efficiency. Recruit crewmates once available — they unlock additional activities and convenience features that reduce travel overhead.
Playstyle options
- Fast & active: follow the route above, prioritise quests and trials, and actively manage port tasks to hit ~50 in ~3–5 hours.
- Relaxed / AFK-focused: push to ~35–40 then switch to shipwreck salvaging and repeatable trials for semi-AFK XP while you plan upgrades.
Checklist before you sail
- Make a few repair kits in your POH workshop (used like food for repairs).
- Bring a saw (equipable is ideal) and a hammer for on-ship repairs and interactions.
- Keep ~10k GP ready for the early small-boat purchase and initial upgrades.
- Have a quick-deposit/menu-swap tool or keybinds handy to speed loading/unloading if you prefer efficient loops.
FAQ
How long does it take to reach level 50 Sailing?
On a focused day-one playthrough this route aims for roughly 3–5 hours of play to reach ~50 Sailing. Estimates vary based on how many side interactions and upgrades you complete; the video walkthrough author estimates about 4 hours.
What do I need to start training Sailing?
Complete the Pandemonium starter quest (the in-game tutorial) first — it grants initial Sailing XP and places you at the Pandemonium hub. After that, prioritise a few easy quests (like Prying Times) and sea-chart interactions to ramp XP quickly.
Where do I begin the Pandemonium quest?
The starter quest can be started at Port Sarim (speak to the NPC that begins the Pandemonium sequence). The quest is short and teaches boat steering while giving early Sailing XP.
What items should I bring?
Bring a few repair kits (made in your POH workshop), a saw (equipable if possible) and a hammer for repairs and interactions. Keep ~10k GP handy for an early small boat purchase and upgrades.
How do port tasks / notice-board tasks work?
Accept tasks at a port notice board. Tasks have level requirements and often require picking up crates at one location and delivering them elsewhere. Your accepted task capacity grows with Sailing level (1–2 tasks early, 3+ later); accepted tasks do not always spawn in the same spot, so route planning helps.
How much XP and GP do port tasks give?
Community reports suggest basic crate deliveries give ~50–60 XP and ~50–60 GP per crate. These are steady, low-value rewards — use them to pad XP while focusing on higher-yield chart interactions, quests, and trials.
What are sea charting interactions?
Sea chart nodes are scattered around the seas (spyglasses, wreckages, stones, corpse finds, etc.). Each is a quick interaction worth ~50 XP and can be collected while travelling between ports; they are cheap to do and add up quickly.
Which quests are important for early Sailing?
Key early quests mentioned by community guides include the Pandemonium starter quest and Prying Times (crowbars), plus several novice-level quests that unlock further charting or items — prioritize quests that both give XP and unlock useful items or upgrades.
When should I buy and upgrade a boat?
Once you have enough GP (the guide suggests ~10k for an early small boat), buy a small boat and add functional upgrades (oak cargo/hull, iron helm/gel) that unlock new tasks and improve efficiency. Upgrade incrementally and prioritise unlocks over aesthetics.
What are Barakura trials and why do them?
Barakura trials are repeatable minigame-like challenges that give substantial XP, especially the first time you complete each stage (first-completion bonuses of a few thousand XP are common). They are excellent for a level boost between ~31–45.
Is Sailing AFK-friendly?
The very early game requires active sailing, charting and task management. From ~35+ you unlock more AFK-friendly methods such as shipwreck salvaging (and better hooks later) which let you semi-AFK while still gaining XP.
What are salvaging hooks and when do they unlock?
Salvaging hooks improve shipwreck salvaging efficiency. Community notes indicate steel salvaging hooks and Barakura shipwrecks become accessible in the mid-30s; later hooks (adamant, etc.) unlock at higher levels and further increase AFK XP rates.
How should I prioritise activities for fastest early XP?
Prioritise quest XP that unlocks content (Pandemonium, Prying Times, etc.), collect sea chart nodes en-route, and stack port tasks that align geographically. Do each Barakura trial once for bonus XP and then repeat the best trials for steady gains.
Can I accept multiple port tasks at once?
Yes — as your Sailing level increases you can accept more tasks at once (for example, 1–2 at low levels and 3+ at higher levels). However, accepted tasks may require pickups from different locations, so plan routes to avoid unnecessary travel.
Where can I find a list of sea chart nodes, tasks and unlocks?
The OSRS Wiki Sailing page is a comprehensive resource for chart locations, task lists, quest unlocks and item requirements. Our guide also links to curated node lists and a planned port-task reference tool.
Are there good AFK or semi-AFK methods?
Yes — once shipwreck salvaging and salvaging hooks are available (mid-30s+), they provide semi-AFK training. Barakura trials and some port-task loops also allow lower-attention play compared to constant clicking, but Sailing is more active than classic fully-AFK skills early on.
How much will upgrades cost?
Early upgrades (oak cargo/hull and low-tier helms/gels) are relatively inexpensive (the guide mentions ~10k GP for the first small-boat purchase). Higher-tier upgrades and large boats can cost substantially more (reports of 200k for larger boats appear in community videos). Costs vary by upgrade and server economy.
Do I need crew members?
Crew members are optional helpers you can recruit (some available at Pandemonium). They provide convenience and unlock additional activities; recruit once you have enough levels and upgrades for more complex tasks.
What should I do if a single task won’t push me to the next quest requirement?
Take additional small port tasks or complete nearby sea-chart interactions to bridge the XP gap. The guide emphasises taking geographically convenient tasks to minimise travel time.
Is Sailing tradeable or does it give items?
Many Sailing activities grant GP, materials or unlock cosmetic/functional boat upgrades. Salvaging and shipwrecks may yield materials; some quest rewards are items. Exact drops and tradeability depend on the specific activity and game rules — consult the OSRS Wiki for item-level details.
Where can I learn more and track my progress?
Use the OSRS Wiki Sailing page for canonical details. We plan to add tools (task reference, route planner, upgrade planner) to this site to help plan routes and estimate time-to-level based on your starting level and playstyle.